Office Hours
Mon to Fri: 8am to 5pm
Step-by-Step Process of a Professional Wood Fence Installation
Table of Contents
Thinking About Installing a Wood Fence? Here’s What to Expect.
nstalling a wood fence isn’t just about placing posts and boards—it’s about planning, precision, and lasting protection. At CDP Fencing & Land Cultivation, we guide South Carolina homeowners through the entire process—whether it’s your first fence or an upgrade. Our pro team handles everything from site prep and permits to the final nail and quality check. In this article, we break down:
- The 8 key steps to a successful wood fence installation
- What you need to know as a homeowner
- How we make sure your fence lasts years—not just seasons
1. On-Site Consultation & Planning
Every great fence starts with a detailed conversation. When you contact us for wood fence installation, we’ll visit your property to:
- Assess your property layout
- Discuss wood options like cedar, pine, or redwood
- Identify slope or drainage concerns
- Go over SC fencing codes or HOA guidelines
- Talk about height, style, gates, and privacy needs
This is where your vision meets our expertise.
2. Surveying Property Lines & Marking Utilities
Before we dig, we make sure everything’s legal and safe. This means:
- Confirming property lines
- Contacting 811 or your utility provider to mark underground lines
- Getting necessary permits (we’ll help handle this if needed)
Why it matters: Digging without knowing where gas, water, or electric lines run can be dangerous—and expensive.
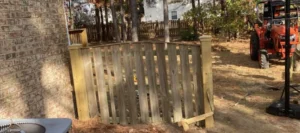
3. Site Preparation
Next, our crew prepares your yard:
- Clear away brush, debris, or old fencing
- Remove any obstacles where the fence will go
- Mark post locations using stakes and string to ensure a straight, level layout
This step sets the foundation—literally—for a sturdy and aligned wood fence.
4. Post Hole Digging & Installation
Once the site is cleared, we dig precise holes for the fence posts. Most posts are:
- Set 2–3 feet deep for stability
- Anchored in concrete to prevent shifting or sagging
- Aligned and leveled before the concrete sets
Proper post placement ensures your fence stays straight even through South Carolina’s storms and seasonal shifts.
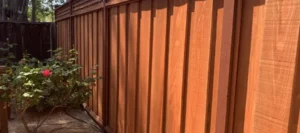
5. Rail & Panel Assembly
With posts solidly in place, we move on to installing the fence panels or pickets:
- Horizontal rails are attached to each post
- Vertical pickets are spaced evenly based on your chosen style
- We use weather-resistant fasteners to secure every piece
Want a shadowbox style? Full privacy? Picket-top accent? You got it. This is the part where your design comes to life.
6. Gate Framing & Hardware Installation
If your project includes a gate (most do), we install the framing and hardware during this phase.
- Posts for gates are reinforced for strength
- Hinges, latches, or locks are installed for security and ease of use
- We test the swing and latch multiple times to ensure smooth operation
For added function and flair, check out our custom gate and fence design options.
7. Sealing, Staining, or Painting (Optional but Recommended)
Depending on the wood and your preference, we can apply a protective finish after the fence is up. This step helps your fence:
- Resist moisture, UV rays, and insect damage
- Stay vibrant in color (especially cedar and redwood)
- Look sharp and stay clean longer
💡 Pro Tip: Especially in SC’s humid climate, sealing your fence is one of the best ways to extend its lifespan.
8. Final Walkthrough & Quality Check
Before we call it complete, we do a full walkthrough with you:
- Check every post, rail, and gate for alignment and durability
- Make sure your property is clean—no mess left behind
- Answer questions about care, warranties, and maintenance
Our work isn’t done until you’re confident and satisfied.
Ready for Your Free Estimate?
If you’re planning a fence project in South Carolina and want it done professionally, affordably, and with care, reach out to our team at CDP Fencing & Land Cultivation We’ll help you choose the right materials, navigate the process, and install a fence that’s built to last. 👉 Get a quote today and bring your fence vision to life.
Related Posts
Serving Your Community
Areas We Serve
Find out if your location is within our service area and how we can help you.